Showing posts with label Skincare!. Show all posts

Thursday, February 13, 2014

Get To Know Your Skin!


What type of skin do you have?

I would ask this very simple question and the response, more often than not, would be some combination of a confused face, a bit of shoulder shrugging, raised eyebrows, and a series of "I don't know" mumbles.  Then I would have to ask a whole series of other questions to try and get down to the bottom of what their skin type was, and they would answer perfectly fine and we'd figure it out together.  What that always told me was that women know the answers to how their skin feels and responds to different products, what it looks like throughout the day, and so on but they don't always know what category of skin type the answers to those questions puts them into.  Not to fear- The Made-Up Mom is here!   

Why you need to know your skin type...

You will be able to perfectly customize your skincare to target what your skin needs!  And you'll be able to better figure out what foundation and powder combination you will need to get the best look and wear for your makeup!

Why do you need to customize your skincare?

The better your skin is the more gracefully it'll age (prevention is cheaper than Botox), and the better your makeup will look!  Your makeup will only look as good as the skin underneath it allows it to look.  Makeup will only even out discoloration in skin- not texture.  So dry flaky patches, fine lines, wrinkles, acne bumps, larger pores, etc... will all still show through your makeup.  With better skin you'll have far less issues to have to attempt illusion correcting with makeup! 

Your skin type is mainly a genetic thing, however, the health and beauty of your skin later in life heavily depends on what you eat and how you take care of yourself, that includes your skincare regime.  If you don't take care of your skin it's only a matter of time before it shows, because IT WILL (no way around it)!!!  So if you can fix these issues just by figuring out your skin type and adjusting your skincare- why not!?  And we get to look younger for longer!?  YES, PLEASE!


There are 5 basic skin types!  Lets break them down!

Normal Skin

Your skin should look and feel vibrant, elastic, and supple.  You're in the super lucky bunch if you have this skin type because it's the least problematic.  It should be clear and smooth, you should have good circulation and a healthy complexion.  Even with the bare minimum care you're in luck for the long haul.  Keep up the good work and thank God for the good genes he blessed you with!

Dry Skin

Your face feels tight most of the time, you rarely (if ever) have traces of oil, and you probably deal with flaky patches somewhat regularly.  With dry skin you may find yourself touching up your makeup often, but not because things slid and moved around- it's more like your makeup pulled a full on disappearing act!  It's because your skin likely absorbed everything in a desperate attempt to hydrate itself!  Unfortunately dry skin can have a sallow tone, pores will be more visible, and it's prone to aging.  Good news- the right skincare will snap this right into shape! 

Oily Skin

Oily skin usually looks thickly greasy and shiny.  It can have a course texture (which is a major sign that the oil is caused from dehydration), usually accompanied by enlarged pores, and it tends to break into a bit of (sometimes a lot of) acne.  Bonus- Oily skin is not prone to much wrinkling- YAY!

Combination Skin

This skin type is pretty common.  It has patches of both dry and oily skin.  Usually the dry zones are the cheeks and around the eyes, and the oily zones are down through the center of the face- nose, forehead, and chin.  This skin type can be a bit of a headache because toproperly treat it you're going to have to separate the two zones and treat them each appropriately.

Sensitive Skin

This skin type often gets confused with dry skin since they share some of the same signs (tight and flaky).  But the difference is this skin type has reactions to products.  Typically, some sort of red spots or reddish scaly areas pop up and it can sometimes even feel itchy and tingly.  It's a fragile type of skin and whoever has this skin type needs to be very ingredient conscious when choosing products.  I also suggest doing patch tests with everything before you slather it on everywhere.  A patch test is when you use a product on a small area of your skin to see how it reacts.  The two spots suggested for patch tests are typically the inside of your elbow joint or behind your ear.   

A general rule of thumb to great skin is to DRINK WATER!!!  LOTS AND LOTS OF WATER!!!  I personally go through fazes where it gets really difficult for me to get my water in for the day (i;m just not in the mood for water) so I will make myself "spa water" by chopping up fruit (kiwi and strawberry is my favorite combination) and filling the rest of the pitcher with water and leaving it over night and by morning you have refreshing, naturally flavored water!  It's delicious!

What skin type do you have and does your current skincare routine seem to help?  Let me know in the comments below or email me using the "contact me" form on the right side of the blog!  If you need any skin care regime suggestions- just ask!  Enjoy!

Love,
Michelle

Monday, February 3, 2014

Makeup Tip Monday- DIY Lip Scrub!


Lately I step outside and with one gush of wind my lips are dry and flaky.  I don't know about you, but my lipstick does NOT look so good laying on top of flaky lips.  If you live anywhere that has snow right now, you know what I'm talking about.  This winter has been super fun for any sledding or skiing you have planned but your skin is not on the good end of this bitter cold deal!  Personally, my lips have taken the biggest beating.  And I can't have shredded coconut looking lips with Valentines Day right around the corner!  I need my red and pink lipsticks to look perfect and I'd prefer to not scratch my Valentine with gnarly lips!  The remedy is a great lip scrub...  

If you don't have 10 minutes to spare and have some extra cash you could try the Sugar Lip Polish by Fresh.

OOoorrr... You could MAKE YOUR OWN!!!

diy lip scrub {transform a dry, chapped pout into a kissable pecker}

What you'll need:

1 Tbsp of Coconut Oil, melted
1 Tbsp of Honey
2 Tbsp of Sugar in the Raw (I like it's coarser texture, but you could just use regular sugar)

Mix it all up into a paste consistency
Dampen your lips
Scrub! Scrub! Scrub! (about 30 seconds)
Try not to eat it (even though it's pretty yummy haha)
Rinse off and pat dry
Apply your favorite lip treatment

The honey and coconut oil will grab and trap moisture into your lips (you can read all about coconut oil here)!  And sugar is a great natural exfoliant.  Although I haven't tried it, I'm sure you could multiply this recipe and make a body scrub out of it.  I found these cute 2oz metal tins and I thought they would be perfect for gifting this DIY project!  Enjoy!

Love,
Michelle

Friday, January 31, 2014

Bright Eyed and Bushy Tailed... Sorta

Fake wakin' it 'til you make it!?  Yes please!  And I'm not talking about taping your eye lids open, although that would be pretty funny.  I've mentioned before in an earlier post that I'm not much of a morning person-- I stay awake to watch the sun rise, not wake up early to see it.  So I'm all about the snooze button and faking awake-ness!  The reality of my current situation is I'm tired because of a teething, bundle of joy reason named Josiah and not because of watching any sun rises.  But either way, who wants to look as tired as they may feel!?  Nobody!

Here are 5 really easy tips to help you look ready to take on your day and actually look pretty convincing:   


1.  Put Your Eye Cream in the Fridge!  The instant cooling effect when you dab it on in the morning will help shock you awake and de-puff all at the same time.  You could also place two metal spoons in the freezer overnight and lay them on your eyes the next morning for the same type of results.  Heads up- it's really awkward and funny to explain when your significant other goes in the freezer to get something and finds your long lost utensils just hanging out...  haha (sorry babe)!  Also one of the most important de-puffing ingredients to look for in your eye cream is caffeine.  That's right!  It not only wakes you up when you drink it, it'll really help drain any extra fluid in your eye area when you apply it topically!

2.  Nude Colored Eyeliner!  It's like concealer for your waterline!  It perfectly removes that red rim that tired eyes get.  A lot of people use a white pencil, but I find it to look a little too bright if you're just wanting to fake the whole "bright eyed and bushy tailed" look.  A great inexpensive one is Rimmel London's Scandal Eyes Eyeliner in Nude.

3.  Stick to Matte-Finish Eyeshadows!  In this case shimmer is going to accentuate puffiness, not our goal!  So, slowly step away from the sparkle!  I also highly suggest using a light cream colored eyeshadow right on your tear duct and the sides of the top of your nose to open up your eyes (just be sure to blend it out). 

4.  Blue Mascara and Curled Lashes!  Blue lashes will make the white's of your beautiful eyeballs look brighter and whiter.  Blue colored mascara might not be your thing but something to consider is layering it with your black mascara so it looks more like a navy blue and not a bright, cobalt blue.    If you want to skip the blue that's perfectly okay, but I would for sure still lash-up and I would definitely curl them too.  "I love flat, lifeless, slept on lashes," said NO-ONE, EVER!  Haha!

5.  Bright Lips!  What better way to take the attention away from your sleepy eyes than putting the focus on another feature!  Go as bold as you feel comfortable.  A day that you're hitting the alarm clock for some extra snooze time is not the day to try your first red lip.  Stick to what you know, but go for something in your current spectrum of fun!

You can use any of these tips on their own or combine them for the most faked awake look you've mastered yet!  Enjoy!

Love,
Michelle

P.S. Sorry for the lack of post yesterday- I got to have a much needed day out!    

Friday, January 24, 2014

5 Good To Know Beauty Tips

Just a few random beauty fix things to have in your brain's back pocket....

I've personally done all of these for years.  Some may be ones you've heard of or tried already, and hopefully there are a few that are new to you!  


#1  If you're out of your favorite exfoliator just mix a teaspoon of baking soda into your facial cleanser when you wash your face.  It's mild enough to not cause any microscopic scratches on your skin, but strong enough to get the job done!  Scrub, scrub, scrub!

#2  Toothpaste a breakout.  Weird but effective- this tip came in handy a lot back when I was 13 (my face could have been worse but it definitely wasn't pleasant)...  Toothpaste has a mixture of certain ingredients (baking soda, hydrogen peroxide, alcohol, menthol, and essential oils) which will cause a pimple to dry out, and it's already mixed for you!  

#3  If your fringe gets oily throughout the day and it starts to clump and separate and you don't have your trusty dry shampoo on hand- ladies that like to touch their hair constantly know what I'm talking about (I fall into that category), our finger tip oils get into our hair and totally mess with our hair vibes so, use two facial blotting papers to quickly absorb all the oil.  One to rub up on your scalp and the other to shake through your fringe.  That's the fail safe thing to do- your other option is the powder brush and translucent powder that you may have in your touch up bag- use a TINY bit of that.  IT HAS TO BE A TRANSLUCENT POWDER, otherwise it'll just look like you did your makeup blindfolded and you unfortunately completely missed your face...

#4  Vaseline your cuticles with a precise brush before you polish your nails, the petroleum jelly keeps your cuticle protected so it can stay a polish flood free zone, and bonus- it keeps them hydrated!   

#5  In the mood for a sheerer foundation but don't have one?  Just mix equal parts of your fuller coverage foundation with your facial moisturizer.  Instant tinted moisturizer!  I personally do this one a lot in the summer on vacation in an attempt to pack less makeup :)

Enjoy!

Love,
Michelle

Monday, January 20, 2014

Makeup Tip Monday- Coo Coo for Coco... nuts!?

Calling all beauties with dry skin!  I told you I had a Makeup Tip Monday for you and here it is:  

Coconut Oil!!! 


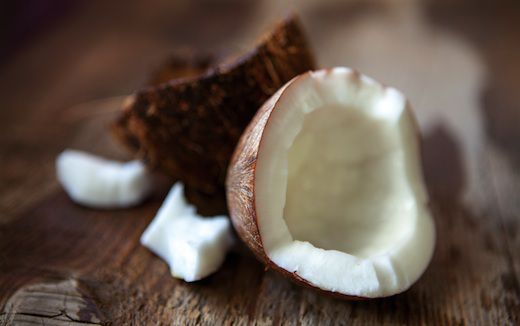
This stuff is magical!  I have two in my house- one in my kitchen (from Costco) to cook with and one in my bathroom (originally from Whole Foods but now it gets re-filled by the one from Costco) to slather on every last dry patch I have.  You can use it as a facial moisturizer, an eye cream, a hair mask, as shaving oil, as a lip balm, and as a cuticle treatment!  So you can quite literally use it from head to toe.  It has the softest, most natural, and not at all perfume-y, coco-nutty scent.  It's just wonderful.  

The fatty acids naturally in coconut oil help reinforce the skin's natural lipid barrier.  They help lock moisture in the skin, promoting some seriously mega hydration.   You can purchase it at your regular super market; you'll find it next to all your other cooking oils.  It comes in a solid form and the texture is a combination between softened butter and candle wax.  That seems weird but it makes perfect sense once you touch it.  It’s workable like soft butter but it has somewhat of a waxy consistency.  However, once you work it in your hands and warm it up it turns into a regular and familiar oil texture.    


Let’s get into all the different ways you can use it!!!

As a Facial Moisturizer and Eye Cream

If your skin in consistently dry and flaky, you'll love this.  Wash your face, exfoliate, and use a softener (it’s like toner but a lot more hydrating, so it’s better for people with dry skin), then slather this on!  It'll be like the long awaited drink of hydration your skin has been waiting for!  It'll smooth out dry patches and condition your skin, it'll minimize fine lines and wrinkles, and even out any natural redness (or "hot spots") on your skin.  You can do this regimen every night (only exfoliate as needed though).  

If you’re not a big makeup wearer, or just hanging out without it for a day, you can also do this regimen in the morning but if you are wearing makeup I would resort to your regular moisturizer since oils are natural makeup removers (oh yeah, you could use it for that too).  If your skin is truly that dry and it just soaks up the oil you could probably get away with just a tiny bit underneath your makeup, I wouldn't go too over board with it though, unless you want your makeup going for a trip-- off of your face! 

If this feels too greasy for you and you can't deal, I recommend mixing the tiniest bit (about the size of a dry bean) into your regular moisturizer.  That way you still get the benefits without the texture.  But the way to go is to just slather it on if you can.  It will NOT clog your pores or cause breakouts.  The molecular structure of coconut oil is too large to penetrate your pores and cause any of that.     

As a Hair Mask

This is a great once a week treatment.  Just section your hair into four sections (go from ear to ear and then a center part all the way down).  Slather this into each section and comb it through.  Put your hair into a bun or braid and go about your business.  Buns and braids cover a multitude of hair sins (aka bad hair days).  Leave the oil in for as long as possible and for a minimum of 2 hours.  Then just wash your hair like you normally do (I pray you know how to do that already)!

As a Shaving Oil

You can do this before or after your shower- whichever is your preference.  For the most hydration I do recommend doing it after, and if you are doing that I also suggest a light towel dry of the area you are shaving before you start.  Just a warning: It will clog up your razor- so have some hot water nearby to shake it off into. 

As a Lip Balm and Cuticle Treatment

No directions required!  Just put some on all day, every day!  To have some that I could take on the go and stick in my purse I took an empty MAC Paint Pot jar, cleaned it out, and then scooped some coconut oil into it!  Crafty huh!?  

I'm telling you- your skin will feel like a baby's bottom!  Oh wait- YOU COULD USE THIS ON YOUR BABY TOO!!!  Instead of baby oil (for all you natural product mama's out there) after a bath just massage them down with some coconut oil!  

Better yet- just fill your tub with coconut oil and dunk your whole family in!  Haha!  You may seriously consider that once you try this and see what a huge difference it makes!  Enjoy!


Love,
Michelle


P.S. Next weeks Makeup Tip Monday WILL actually be about makeup!  I promise :) 

Monday, January 13, 2014

Makeup Tip Monday- Oily Skin? Put Some Milk on it!


Happy 1st Makeup Tip Monday!  YAAAY!

We're starting off with an oldie but goodie that lots of people don't know.  If you have SUPER oily skin-- we're talking like within a few hours of doing your makeup you could scrape it off, slap it in a pan, and fry something kind of super oily-- put some milk on it!  Not just any milk though.  Go to the drug store and pick up a bottle of Milk of Magnesia.  Yupp, you heard right! Milk of Magnesia, you know- the stomach stuff...

It looks like this
Phillips Milk of Magnesia Saline Laxative Liquid Original


Use this instead of primer on your face and you will NOT see oil on your face ALL DAY LONG!  I promise! It's a little weird but, trust me, it works!  If you're doing anything and you're going to be photographed, or just out for a while and don't have time to be touching up constantly, you're going to need to keep the oil at bay for as long as possible and this will do that!  This was my face saver (literally) towards the end of my pregnancy, my t-zone could rival any slip n slide!  I know, I'll just say it for you, "gross!"  I usually have normal to dry skin and that oil threw me for a curve.  When I realized it wasn't going down with just switching up my skincare, I whipped this out of my kit and it SAVED my face!  I have used this on so many brides and it gets a laugh every single time, but every single time an amazed "thank you" text comes after the wedding.  It works! 

You still do your normal routine- just add this in after moisturizing but before foundation.  You could apply primer as well but honestly, you don't need to.  You can apply it with your hands, but for the most even results I'd apply it with a standard flat, synthetic, foundation brush and keep in mind-- a little goes a long way.  

WARNING!!!  It goes white when it dries!!!  Like you rubbed chalk all over your face- but that's nothing to worry about because your foundation will make you look normal again :) It's just a little frightening when you use it the first time, and I want you to come back and visit my blog again!  Good news-- even though it goes white there is NO flashback, so you can take pictures totally stress free!  

Please don't buy cherry flavored, that would be awkward haha!  Just get the one that says "original."    

If your oil is not that serious and you have normal to oily skin you can use the Milk of Magnesia as a face mask 1-2 times a week to help.  Just wash your face, rub some on, then wait about 20 minutes and wash it off!  Follow it up with your normal toner, treatment, and moisturizer routine.

Now the best part is if you're having the random stomach issue-- YOU'RE SET! Haha!  But seriously... 

If you wanted matte skin, you'll now get to have it.  And if you wanted properly done dewy skin, you could now go buy those highlighters that you've been holding off on or that's stuffed at the back of your makeup drawer (or if you're like me and have drawerssss) and not have to worry about your natural oils combining with the shimmer highlight and your face becoming the human flashlight!  You know what I'm talking about...

Send me a message or comment below and let me know if you try this and how it worked for you!

You're welcome! 

Love,
Michelle

P.S. Sorry gals with dry skin!  I have a Makeup Tip Monday for you- this just isn't it...