Friday, January 31, 2014

Bright Eyed and Bushy Tailed... Sorta

Fake wakin' it 'til you make it!?  Yes please!  And I'm not talking about taping your eye lids open, although that would be pretty funny.  I've mentioned before in an earlier post that I'm not much of a morning person-- I stay awake to watch the sun rise, not wake up early to see it.  So I'm all about the snooze button and faking awake-ness!  The reality of my current situation is I'm tired because of a teething, bundle of joy reason named Josiah and not because of watching any sun rises.  But either way, who wants to look as tired as they may feel!?  Nobody!

Here are 5 really easy tips to help you look ready to take on your day and actually look pretty convincing:   


1.  Put Your Eye Cream in the Fridge!  The instant cooling effect when you dab it on in the morning will help shock you awake and de-puff all at the same time.  You could also place two metal spoons in the freezer overnight and lay them on your eyes the next morning for the same type of results.  Heads up- it's really awkward and funny to explain when your significant other goes in the freezer to get something and finds your long lost utensils just hanging out...  haha (sorry babe)!  Also one of the most important de-puffing ingredients to look for in your eye cream is caffeine.  That's right!  It not only wakes you up when you drink it, it'll really help drain any extra fluid in your eye area when you apply it topically!

2.  Nude Colored Eyeliner!  It's like concealer for your waterline!  It perfectly removes that red rim that tired eyes get.  A lot of people use a white pencil, but I find it to look a little too bright if you're just wanting to fake the whole "bright eyed and bushy tailed" look.  A great inexpensive one is Rimmel London's Scandal Eyes Eyeliner in Nude.

3.  Stick to Matte-Finish Eyeshadows!  In this case shimmer is going to accentuate puffiness, not our goal!  So, slowly step away from the sparkle!  I also highly suggest using a light cream colored eyeshadow right on your tear duct and the sides of the top of your nose to open up your eyes (just be sure to blend it out). 

4.  Blue Mascara and Curled Lashes!  Blue lashes will make the white's of your beautiful eyeballs look brighter and whiter.  Blue colored mascara might not be your thing but something to consider is layering it with your black mascara so it looks more like a navy blue and not a bright, cobalt blue.    If you want to skip the blue that's perfectly okay, but I would for sure still lash-up and I would definitely curl them too.  "I love flat, lifeless, slept on lashes," said NO-ONE, EVER!  Haha!

5.  Bright Lips!  What better way to take the attention away from your sleepy eyes than putting the focus on another feature!  Go as bold as you feel comfortable.  A day that you're hitting the alarm clock for some extra snooze time is not the day to try your first red lip.  Stick to what you know, but go for something in your current spectrum of fun!

You can use any of these tips on their own or combine them for the most faked awake look you've mastered yet!  Enjoy!

Love,
Michelle

P.S. Sorry for the lack of post yesterday- I got to have a much needed day out!    

Wednesday, January 29, 2014

Conquering Your Baby's Cold...


Last Monday morning my little man started coughing and sneezing and by Monday night we were in full "he has a cold" territory!  Then of course he turns into the biggest cuddle bug on the planet and he is just so cute that I can't help giving him a thousand kisses-- which then left me on Tuesday morning in "I have a cold now, too" territory!  Our house was the place to be (or not) last week!  I'll take him getting me sick any day verses me getting him sick (that's what happened last time).  The horrible guilt you feel is the worst!!!  Ugh, lets just say it's enough to make you legitimately try to seriously quarantine yourself at the slightest glimpse of a cold...

Pre Josiah, anytime I felt a sign of getting a cold I had a "go to" blend of medications (usually something that involves Tylenol Cold and Dayquil) that I would take to kick it before it got serious.  But now, because I'm nursing, I didn't take any meds to attempt speeding up recovery and guess what!?  We survived!  

I realize that this post isn't for everyone, but at some point in life you may have to deal with a sniffle-y baby so these are just things that got Josiah and I through.  Also to my fellow parents/nanny's out there- please feel free to comment anything that you have done that may help me and my little man, or other parents and nanny's out next time the sniffles come to town!  Thanks for your help in advance!       

I coated myself in Vicks Vapor Rub!  I also rubbed a generous amount onto Jojo's feet and put his socks on and that helped him tremendously.  

Add 2-3 drops of eucalyptus oil to the water at bath-time.  And anytime anyone was taking a shower in our house we hung out with Jojo in the bathroom.  The steam really helped clear him up and allowed him to breath better.

I Vaselined our noses constantly so they wouldn't get chapped- so we looked miserable aaaand shiny (but it worked)!

We whipped out the vaporizer and stuck a Vicks Vapo-pad into it.  It was so helpful getting the baby through the night.  I also propped him up on pillows to help his nose drain better.  This only lasted until he fell asleep, but I noticed it helped. 


Vitamins were a must!  I take a few different daily multi-vitamins regularly that offer a few different things.  And on top of that I took some Airborne and extra vitamin C.  I also made sure Jojo took all of his vitamins too.  His taste awful!  Like a metallic chalky taste and he makes the funniest faces but he gets through and I nurse him right after to help get the taste out of his mouth (I don't know that I NEED to do that, but I feel bad).  Haha.  By the way, his infant vitamins stain EVERYTHING!!!  And I've discovered that regular dish soap and cold water get them out (Oxi Clean and Bleach didn't work for me), but don't let the stain sit for too long.  

We both drank lots of fluids!  Teas and coffee don't count (I wish they did).  For Jojo we gave him water or warm broth in a sippie cup throughout the day.  I also made some chicken noodle stew (I like my soups really loaded with lots of goodness so they end up out of soup territory) and I pureed some for Jojo to eat as well!  If you want the recipe just comment below to let me know!

Honey and lemons!  I took some all natural honey and lemon lozenges that Charlie found at Walgreens the last time Josiah and I were sick.  I also made myself some of my favorite lemon tea:

Squeeze of half a Lemon
1 Tbsp (or to taste) of Honey
A pinch of Cinnamon

Put everything into an 8oz mug and top it off with hot water.  

It's actually really yummy, it's super good for your body in general, it is great at revving up your metabolism in the morning, and in my recent state it was especially great at soothing my sore throat.  

*Side Note* For a while I drank this lemon tea every morning and my skin never looked better.  I should do that again...

Thanks for stopping by today and I pray good health over you and your family!  

Love,
Michelle 


Tuesday, January 28, 2014

The Grand Grammys

It's the big party of the year for the music industry!  

And musicians for sure know how to shake it up in the fashion category- lots of light reflective and sheer fabric numbers.  In general, the makeup was balanced so to not compete with whatever they were wearing.  

 Following suit with my Tuesday review of award show style and makeup, here we go again!  Lets get to talking about all the faces that got it right!

Sultry Smoked Out Plums

Rita Ora


One of my favorite looks of the night!  The tone of the blue based purple with the tiniest bit of sparkle (check out Sugarpill's Poison Plum Eyeshadow) on her lids perfectly complimented the purple-y tone that reflected off her sleek sequined dress and the old Hollywood waves created a great balance to this look.  I love that she didn't do her signature bold lip (although that was a big trend on this red carpet) and she skipped a bold liner, she just went straight to her eyes and lots of lashes.  For every day you could just go to town with a great mascara (check out my mascara suggestions), but if you're headed out for a night on the town try Flutter Lashes' handmade mink lash in "Ashley" for the perfect bold lash.  They are averagely priced for handmade mink lashes but a bit pricey for a false lash in general, here's the thing- if you treat them right you'll get a ton of wears out of them!

Perfectly Pretty

Katy Perry


Miley Cyrus


These two ladies have almost the exact same makeup, the eyeshadows, lip color, and cheek color are all practically identical.  Katy just went a little bolder in a few areas, which takes this look to an intensified level.  Isn't it so interesting how just a few makeup alterations can do that!?  I think it's fascinating!  Lets talk about how they're different...   

The most obvious difference is how Katy amped up her eyes by adding in a winged liner and falsies.  Which is a really easy way to take any daytime makeup to something more evening appropriate.  

Katy added (well- her makeup artist did) a shimmery eyeshadow highlight on the brow bone and tear duct.  Try "Shroom" eyeshadow by MAC.  It's a soft white color with the perfect amount of shimmer.  It's a great way to brighten and "open up" the eyes.  

Katy's skin is more of a matte finish through the t-zone making her look a little more made up.  By no means is that a bad thing- it's just preference.  A little semi-dewy foundation looks more like natural skin verses one with a matte finish.

Katy's brows.  Miley looks like she has the smallest amount of brow powder through her brow and maybe a brow gel to set it.  While Katy's is filled in a bit more with a brow pencil.  Just that one thing takes this whole look from innocent (not a typical word people have used in reference to Miley Cyrus these days lol) to glamorous!

Smoke and Lips

Beyonce Knowles


This makeup is so beautiful.  A smokey eye and dark lip can be difficult to pull off without looking a bit drag-queen-ish.  She not only pulled it off- she made it look effortless!  The problem with making anything look effortless is that it actually requires a lot of effort!  Haha!      

The trick to this is to not go too sharp and structured on the eyes.  Pick one gray eyeshadow color and work on getting it blended seamlessly.  This is not the time or look for the perfectionist in you to show up and obsess over sharp clean lines.  The smudgier and smokier the better!  Just make sure it's blended, smudgy and smokey doesn't mean blotchy...  

Definitely contour your face, but I don't suggest going more than 1-2 shades darker or lighter than your natural shade in choosing the colors you're going to work with.  You're going to want to keep this contour subtle.  

This lip is absolutely amazing!!!  To replicate this I would use "Diva" lipstick all over the lip with "Viva Glam I" lipstick through the center of the lip for a red-er pop through the middle and line with "Burgundy" lipliner (all by MAC).  Then blot the whole thing and add the smallest amount of clear lip gloss to add a slight shine.  You can definitely choose to not blot this lip (it would be just as beautiful), but if you want to replicate this lip perfectly- take a closer look at the photo and you'll see it's not a perfectly sharp, cleaned up lip- it's a little disheveled looking and blotting it will get you there without having to worry about if you did it right.

Lots of Lips

There were a lot of rocking bold lips on this carpet.  So I'm going to go straight through the list and suggest what to use to get each of these lip combinations!  FYI- all the products will be MAC.

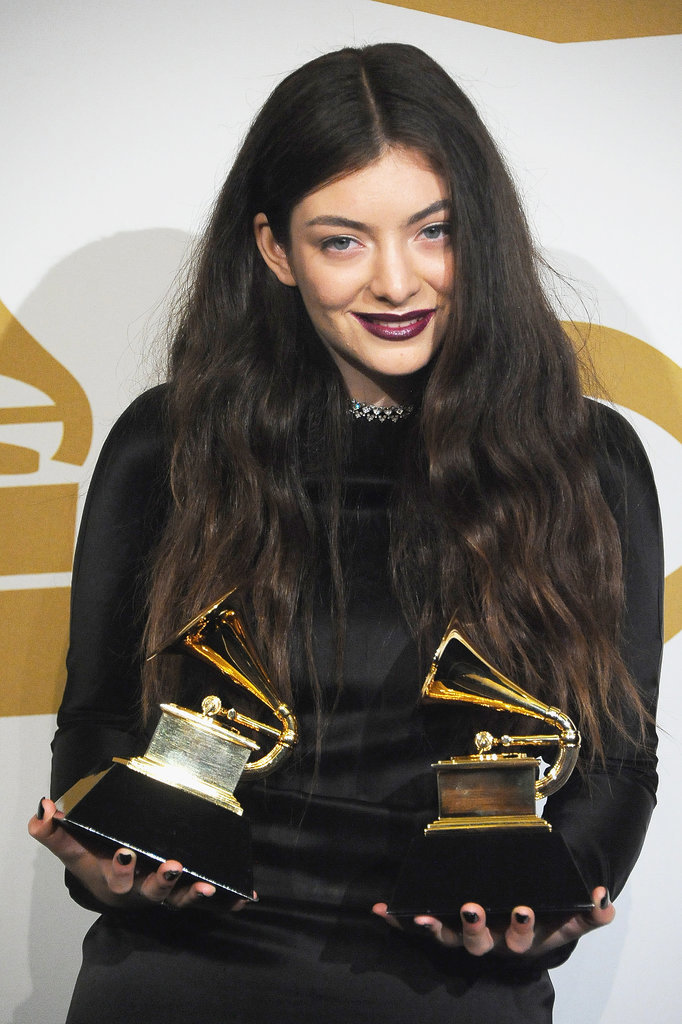
Lorde


"Nightmoth" Lipliner with "Cyber" Lipstick then "Heroine" Lipstick just popped through the center of the lip

Kelly Osbourne


"Rebel" Lipstick with "Beet" Lipliner

Rihanna


"Viva Glam Rihanna" Lipstick with "Brick" Lipliner

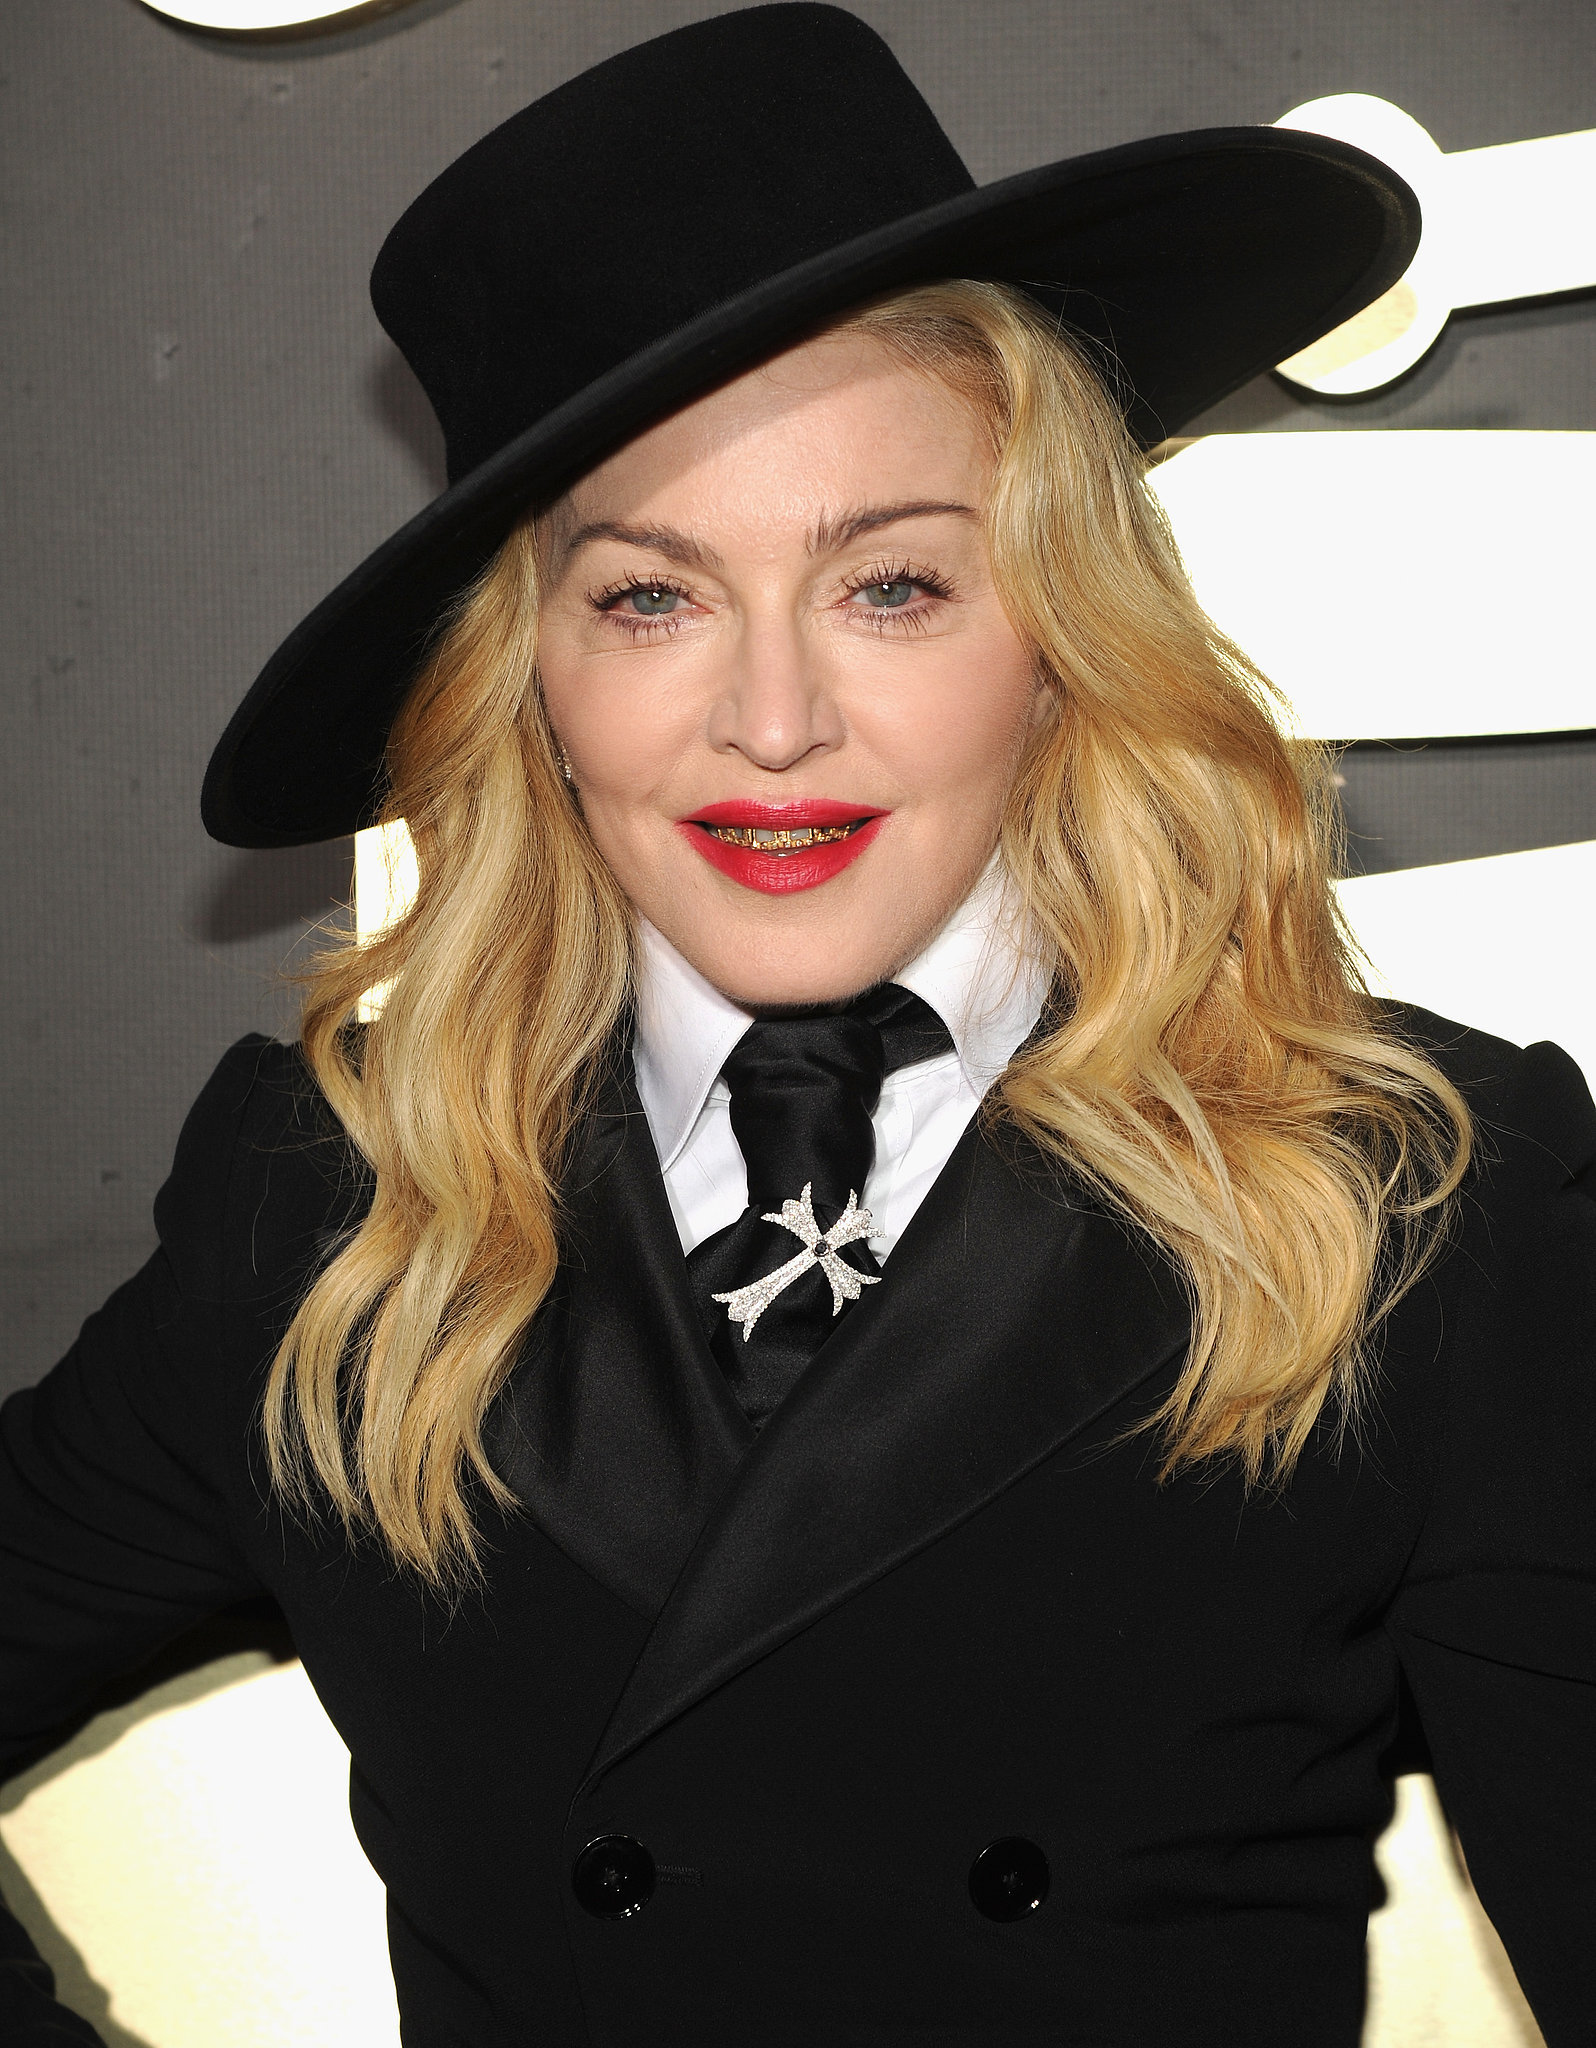
Madonna


"Cockney" Lipstick applied lightly so it looks like a stain then strategically place "Cherry" Lipliner where ever needed

Sarah Hyland


"Can't Resist" Lipstick with a bit of "Brick" Lipliner 

My Pick for Most Amazing Dress of the Night

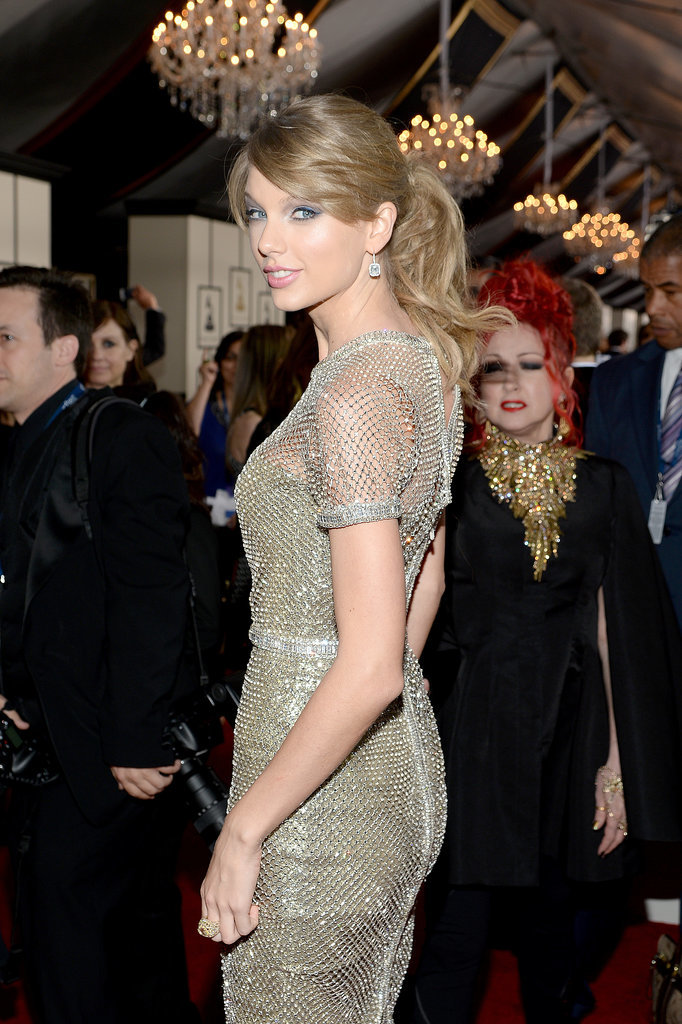
Taylor Swift


I loved the choice of colors her artist used in her makeup.  Her eyes were a plum-y hued gray smokey eye with a navy blue winged liner and lots of highlighter, then the rest of her face was a blend of beautiful soft pinks.  When I took a closer look I noticed the application was not as perfected as I thought it should have been (I'm a stickler for a sharp winged liner), but overall she looked so beautiful!

I hope you beauties are having a great week!  Enjoy!

Love,
Michelle


Monday, January 27, 2014

Makeup Tip Monday- Keep Your Eyeliner From Straying Away

Ever find yourself frantically pleading with your eyeliner to just STAY-PUT!?  Well beauties, plead no more! 

Most cosmetics companies offer waterproof eyeliner options, in pencil forms, creamy gels, and liquids.  Some hold up great, and some don't exactly live up to all they promise.  If you want to know the ones that have stayed through it all for me just comment below and let me know!

The eyeliner formula that causes the most stray away stress is a kohl pencil.  This little lady is all about the smudge and the smoke.  Made famous by none other than the Olsen twins... 

Love the Olsens eye makeup

Simply Fabulous - when I finally get enough nerve to cut my hair again


Mary-Kate Olsen is more bold than her sister Ashley when it comes to makeup and hair. And the dark eyes, and the intense dark red lips looks gorge on her!

Confession: I seriously can't tell them apart...

It's the perfect formula for some of these eyeliner trends we're seeing coming down the runways lately.  Unfortunately, it's also the formula that slips and slides right off your eyes to everywhere else on your face and you find yourself looking way grungier than you intended.  You want to place it, smudge it into place, and you want it to stay just the way you've "perfectly" messed it up!  All day!  After all, you worked hard to mess up your liner!  Not too tall of an order, here's how you hold it:

Set it and forget it!  When you put your liquid foundation on you put some powder over top to set it right!?  If you don't- you should.   The same goes for this creamy eyeliner.  You set it with a powder to "dry" it and it'll hold up at least twice as long.  You can set it with either an eyeshadow that matches the color of your eyeliner or you can use a bit of transparent finishing powder.  My preference is to use an eyeshadow, although both would work...

You can also look into sealers, like the Make Up For Ever Aqua Seal.  The directions on this says to mix it with your product before you apply it.  However, using a pencil eyeliner for a smudgy line isn't exactly a mixable opportunity.  So what I like to do is apply my liner, get it all where I want it, and then put one drop of the Aqua Seal on a flat brush and dab it on over top of my eyeliner.  It feels wet and can get slightly sticky for a second (if you are someone that deals with a lot of eyeliner transferring to your lids I would avoid opening your eyes for a few seconds until this dries) and once it dries you are good to go!  Enjoy!

Love,
Michelle


Friday, January 24, 2014

5 Good To Know Beauty Tips

Just a few random beauty fix things to have in your brain's back pocket....

I've personally done all of these for years.  Some may be ones you've heard of or tried already, and hopefully there are a few that are new to you!  


#1  If you're out of your favorite exfoliator just mix a teaspoon of baking soda into your facial cleanser when you wash your face.  It's mild enough to not cause any microscopic scratches on your skin, but strong enough to get the job done!  Scrub, scrub, scrub!

#2  Toothpaste a breakout.  Weird but effective- this tip came in handy a lot back when I was 13 (my face could have been worse but it definitely wasn't pleasant)...  Toothpaste has a mixture of certain ingredients (baking soda, hydrogen peroxide, alcohol, menthol, and essential oils) which will cause a pimple to dry out, and it's already mixed for you!  

#3  If your fringe gets oily throughout the day and it starts to clump and separate and you don't have your trusty dry shampoo on hand- ladies that like to touch their hair constantly know what I'm talking about (I fall into that category), our finger tip oils get into our hair and totally mess with our hair vibes so, use two facial blotting papers to quickly absorb all the oil.  One to rub up on your scalp and the other to shake through your fringe.  That's the fail safe thing to do- your other option is the powder brush and translucent powder that you may have in your touch up bag- use a TINY bit of that.  IT HAS TO BE A TRANSLUCENT POWDER, otherwise it'll just look like you did your makeup blindfolded and you unfortunately completely missed your face...

#4  Vaseline your cuticles with a precise brush before you polish your nails, the petroleum jelly keeps your cuticle protected so it can stay a polish flood free zone, and bonus- it keeps them hydrated!   

#5  In the mood for a sheerer foundation but don't have one?  Just mix equal parts of your fuller coverage foundation with your facial moisturizer.  Instant tinted moisturizer!  I personally do this one a lot in the summer on vacation in an attempt to pack less makeup :)

Enjoy!

Love,
Michelle

Thursday, January 23, 2014

May I Suggest A Mascara?

Once upon a time...

Long before Latisse told us we could grow better lashes, and before Jennifer Lopez batted handmade mink falsies at the Oscars.  Before mascara became waterproof, smudge-proof, and multicolored, there was a gal named Mabel, who simply wanted darker, fuller lashes.  Her crafty (and genius) brother, T.L. Williams, mixed an odd concoction of coal dust into some Petroleum Jelly and the first mascara (and Maybelline Cosmetics) was born! 

Cool, huh!?

I have to say- cosmetics companies have come a seriously long way since then!!!

I love to play with makeup (obviously), I love different looks and levels of drama, different colors, different finishes and textures.  You can often find me switching up everything depending on the look that I've decided to do, and my mascara is no exception.  I'm blessed with decently long lashes with a good curl (thanks Mom and Dad), so I don’t find it generally difficult to find a basic mascara that gets the job done.  And yet, I still want longer, bigger, and bolder lashes, because this is 2014 and I live in America!!!  Land of the free, home of the brave, and it's all better super-sized!!!

Combine all of my personal play with the countless faces I've done up and the plethora of different lash types and lash needs I've encountered, I've become somewhat of a mascara connoisseur!  So, without further adieu, here are the ones that survived it all!

When I just want fluffy, soft definition


This was my very first "good" mascara, and none have quite measured up in this category since!  It perfectly separates each lash without clumping no matter how many times you swipe.  It gives you the perfect doe eyed Bambi lash.    

When I want length without drama


This teeny little brush allows you to get in there, right at the root of the lash and keep building, and building, and building from there.  If you're the girl that chases your mascara with a fine needle lash comb, you'll probably love this one!  This is also a perfect layering mascara if you like to cocktail them!

When I want length with defined volume


The texture of this mascara is whipped, so it feels super light.  And if you need to go back over your lashes later in the day for whatever reason, this one won't flake off the previous layers that have dried on.  Plus the tip of this wand is spiked, so you can use the tip to really get in there and place every lash just where you want it.  You get what I call Minnie Mouse lashes with this one (apparently Disney characters are my only lash references for tonight, haha)!

When I want build-able fluffy volume


This mascara has a super fluffy brush and soft formula that allows you to really build up to your preferred volume.  It's won a lot of awards for a reason.  

When I want it all (darker, longer, bigger, and bolder)


This lady has a dual wipe-out system for it's brush.  Option one claims to give length (I personally think it gives a very basic lash), but then you have option two!!!  Option two is where it's at!  It leaves so much more mascara on the wand that you get this fantastically massive lash and everyone thinks you're wearing false eyelashes! 


A few general things to keep in mind...

You can't rely on mascara commercials and magazine advertisements- THEY LIE!  You probably could have already assumed that, but what a lot of people may not have the eye to catch is that in the commercials and magazine advertisements- the celebrity/model is wearing false eyelashes- literally- every- single- time!  Even when they "look" natural, they're wearing individual lashes.  Sneaky, sneaky!

Mascaras don't curl- only lash curlers do (my favorite lash curler is the one by Shu Uemura).  They can help to keep curl by not weighing down the lash, but they won't magically push them up into perfectly curled heaven...  

You may ask why all my suggestions are higher end brands.  The main differences that I've noticed between drug store mascaras and prestigious brand's mascaras are that the better quality ones don't flake as much, they are a lot more conditioning to your lashes, and even if they are not waterproof they hold up much better through some serious treadmill sweating situations at the gym!  That all just happens to be my personal experience. 

I feel pretty confident that one of these mascaras will fit your lash needs!  Comment below what your favorites are!  Have a marvelous day beauties!

Love,
Michelle

Wednesday, January 22, 2014

Polished Paws Picks!

My Fall/Winter Nail Color Picks!

For me personally color in general is an expression of my mood, and my embarrassing sausage fingers are no exception to that.  I love the subtle statement you can make with your nails.  It's an inexpensive way to stay trendy, and to get to wear colors you maybe wouldn't normally in your makeup or wardrobe.  The best parts- you can change them as often as you'd like (or have time for) and the options are endless!  

These are my current favorite nail colors to sport for Fall/Winter 2014.  Some are new colors but most are old stand-by's in each collection.  

No Place Like Chrome by Essie


It's like liquid metal nails!  Gotta love that!

Marshmallow by Essie


A sheer creamy white.  It's the perfect winter white nail polish! 
(I'm actually wearing this color this week)

Muggins by Butter London


I've been really loving gray this season, I'm sure it has something to do with the dreary weather.  This is by far my favorite pale gray that I've come across to date.

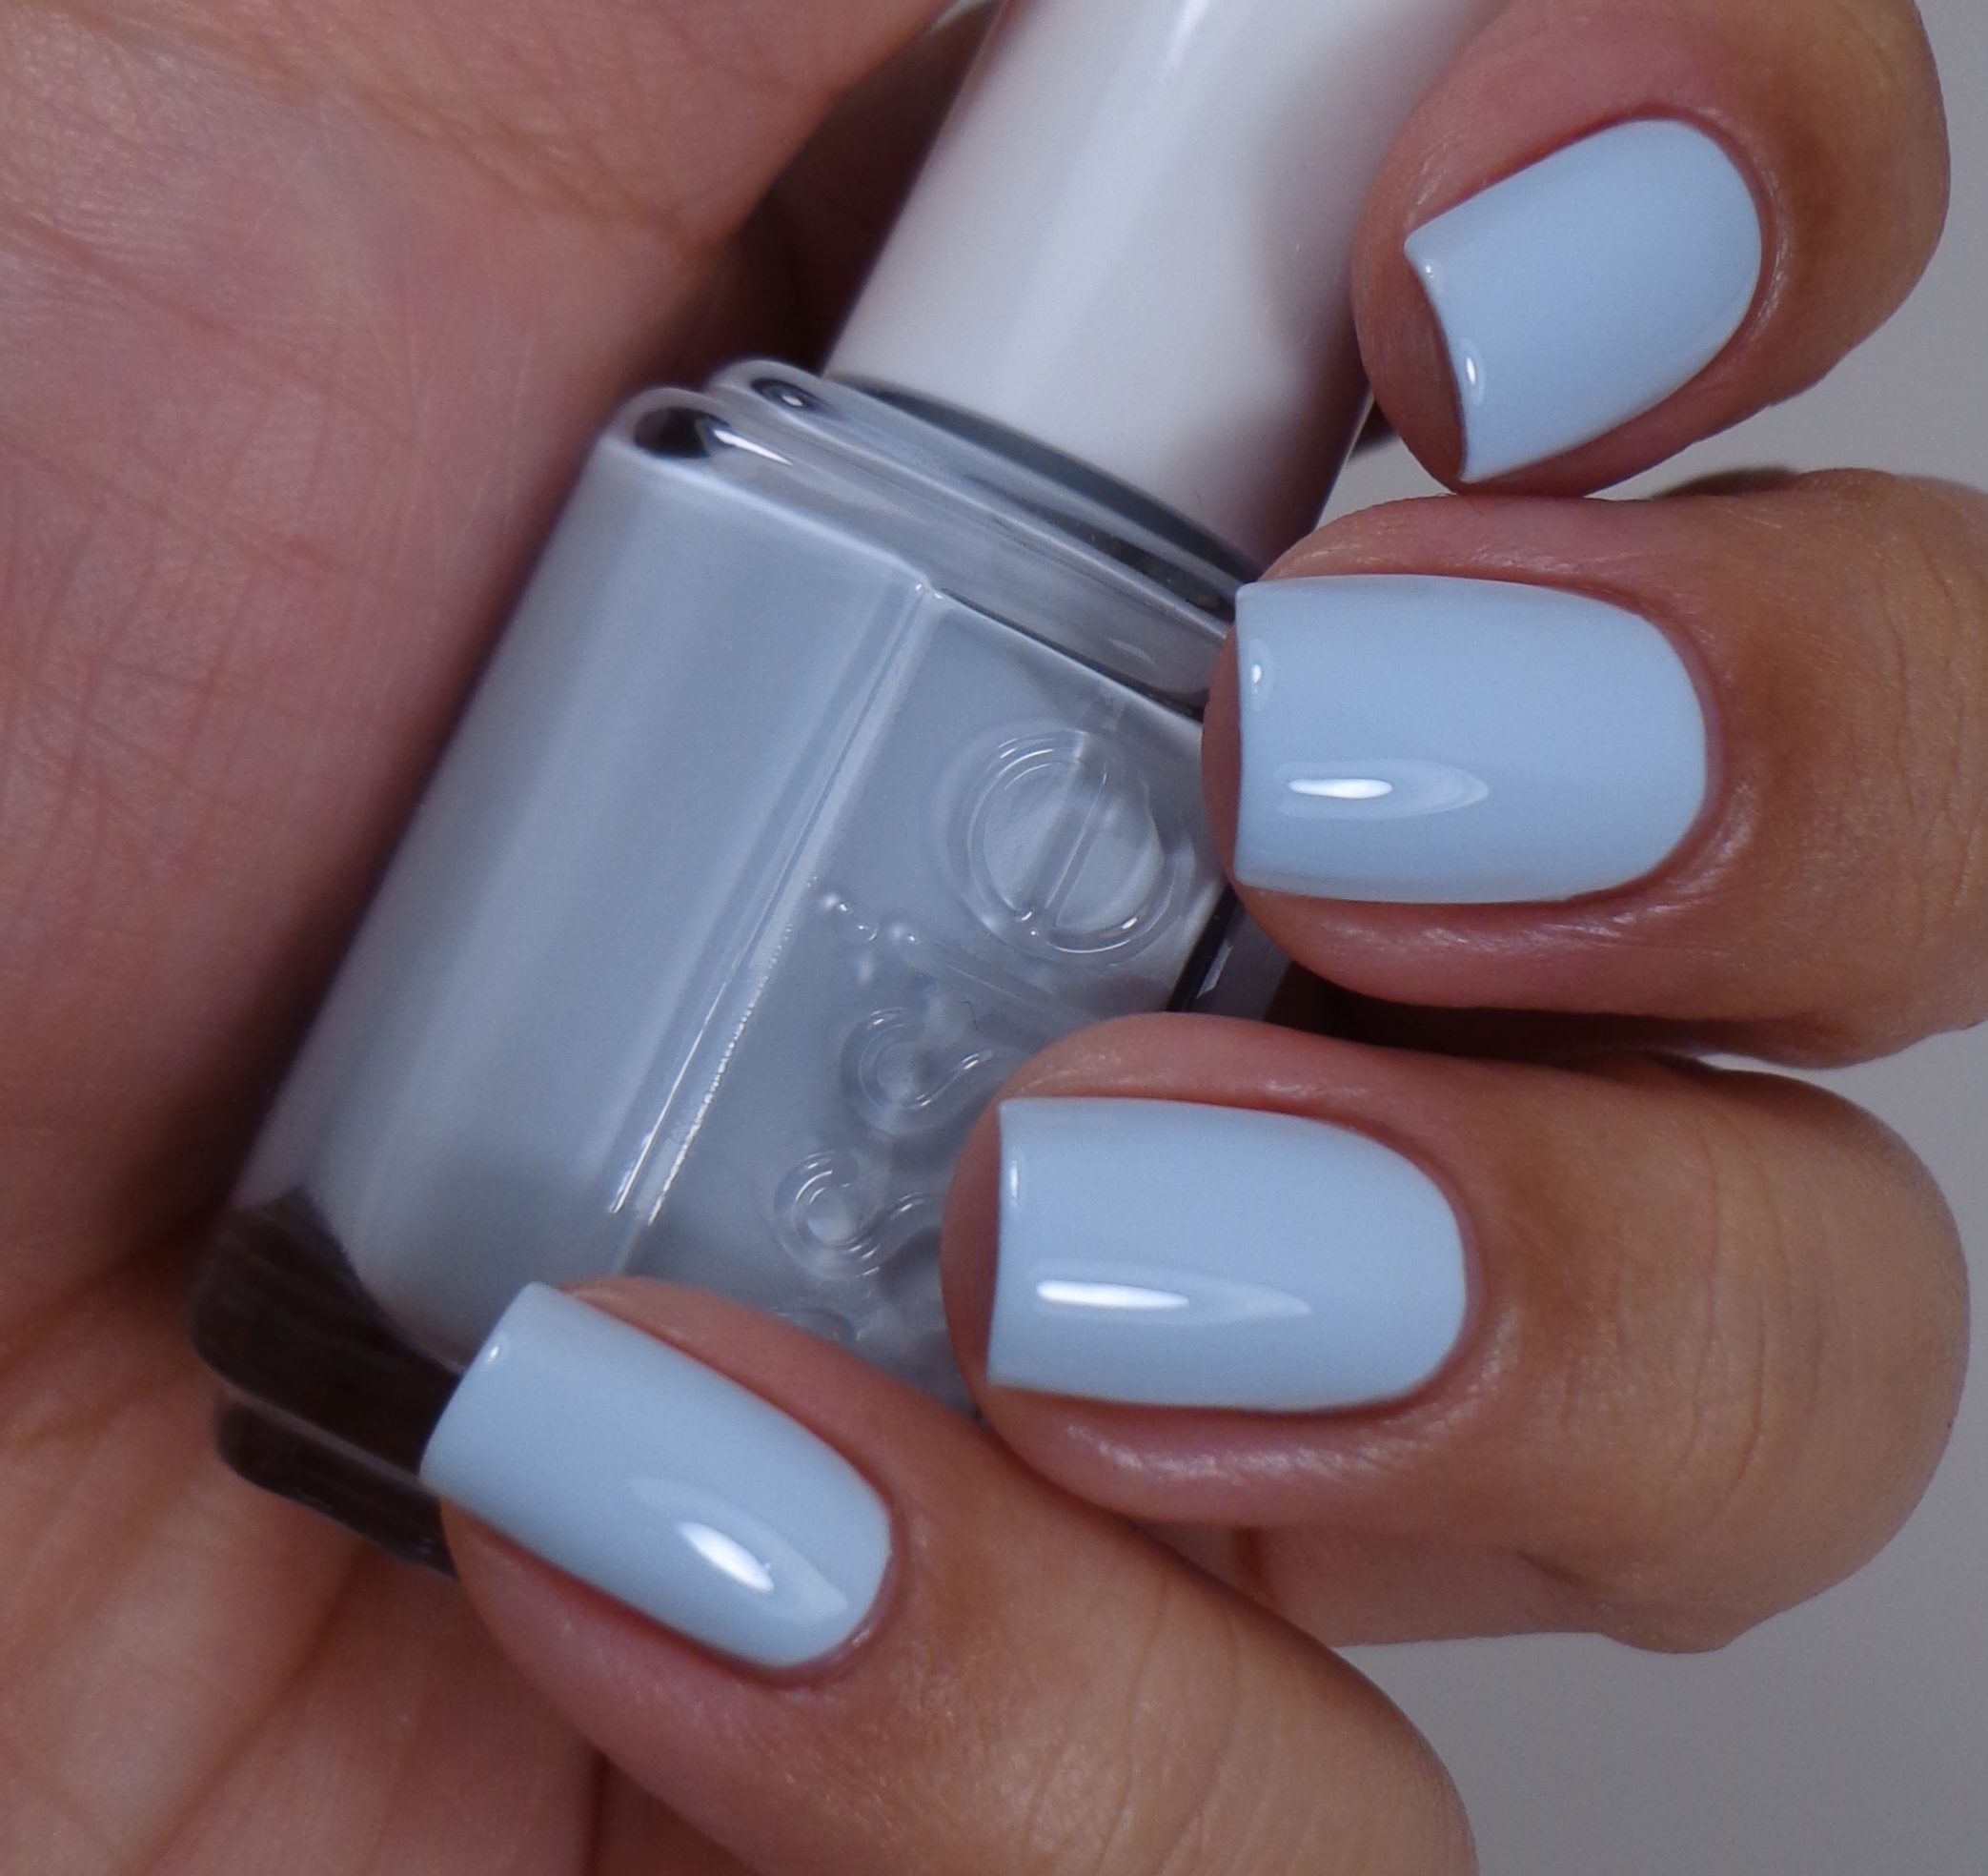
Find Me An Oasis by Essie


A super pale creamed blue.  I just love blue hues in the cold.

Nice Is Nice by Essie


My favorite lilac/ lavender polish.  I love that it's not too blue based.

Jade Is The New Black by OPI


The holidays have come and gone and you're probably over red nails so try a striking emerald polish instead.  I always get tons of compliments when I wear this color.

Call Me Irresponsible by Deborah Lippmann


Perfect case in point- this color is the "color of the season" and I don't own much in this color AT ALL!  So my noncommittal fix is to put it on my fingernails!

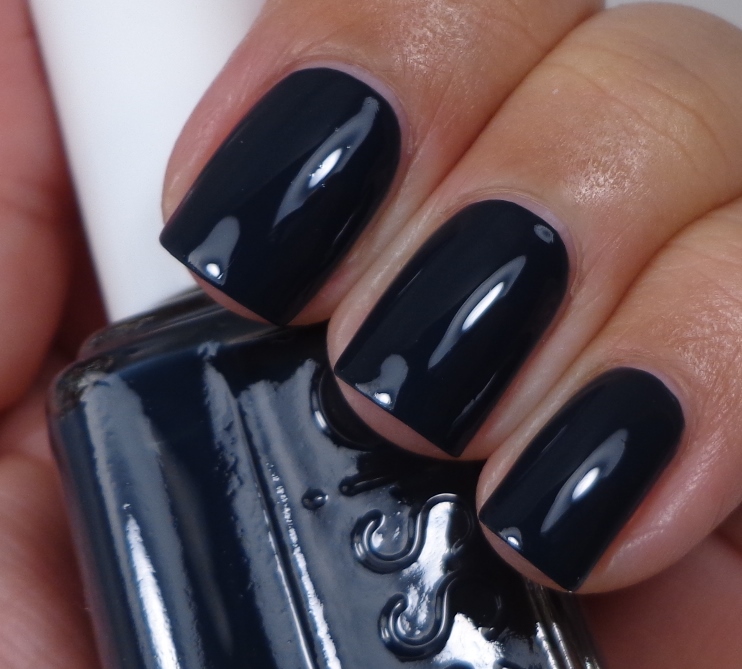
Mind Your Mittens by Essie


A blackened teal.  Love. It.

Suzi Skis In The Pyrenees by OPI


I love a black manicure, but this dark charcoal gray is the perfect updated and softer alternative. 
(Just for the record- I couldn't say this name 10x fast)   

I Sing In Color by OPI


I can't go through a single cold weathered season without rocking a super deep vamp-y red polish.  Here's another one to add to the bunch!
  
Just in case it's not as obvious as I think it is- my favorite polish finish is an opaque creamed finish and these are not my hands in all these photos. 

I hope you see a few shades you haven't tried before!  What is your favorite nail polish you've been wearing a lot this season?  Comment it below, I'd love to know!

Love,
Michelle  

Tuesday, January 21, 2014

May I Have the Envelope Please?

Gotta love all the inspiration that comes with award season.  All the gowns, all the hair styles, and of course... all of the makeup!!!

The Screen Actors Guild Awards is always the "fun one" for the actors, and you could tell in the interviews down the red carpet.  Everyone just seems so much more comfortable.  They say the best part for them is that they get to vote for their peers and mentors.  I personally love admiring my peer's and mentor's work and I desperately wish I could give them all awards!  Wouldn't that be fun!?

The fashion down the SAG Award's Red Carpet is a little more fun and everyone looks a lot more relaxed.  I mean, Emma Thompson wore flat sandals and Julia Roberts wore a jumpsuit... it doesn't get much more relaxed for award season than that!  

As far as the makeup was concerned- everyone played it cool, fresh, and simply pretty.  It was all around approachable and easily achievable.

Here are my painted face picks from the SAG Awards and a couple product suggestions for you to replicate them with!

Monocromatic Amazing-ness


Cate Blanchett


So beautiful and so simple.  This is a perfect, everyday, pretty makeup.  Going with the same color on the eyes cheeks and lips is the perfect way to look polished but not overdone.  You can easily get this look by taking your blusher of choice (I'd suggest Dame by MAC for Cate's soft pink) and popping it not only on your cheek but in your crease as well.  Then match a lipstick/gloss (try Snob Lipglass, also by MAC, to match hers) to finish off this fresh, youthful look.  


Ethereal Beauty


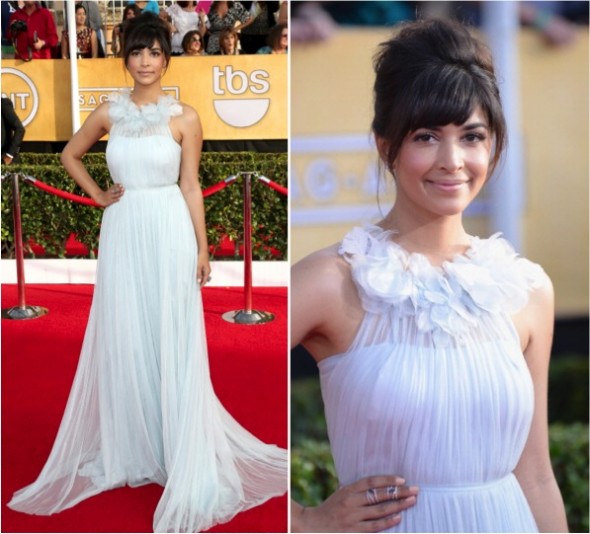
Hannah Simone


Check out her gorgeous cheek highlight!  It's all about the cheeks in this one, since everything else is so muted.  We have the usual suspects of bronzer and contour and then we have the stars of this makeup, the blush and the highlight.  For blush I'd go for something like Warm Soul by MAC and for the highlight Whisper of Guilt by MAC (limited edition) or BECCA Shimmering Skin Perfecter in Rose Gold.  And can I just say- THIS-DRESS-IS-STUNNING!!!  I love the super pale blue color!

By the way-- if you're into Jennifer Lopez/ Kim Kardashian glowing skin and have never checked out BECCA's highlighters-- you're missing out on some seriously beautiful glow-y goodness.  Go to Sephora and have a look for yourself.  They won't disappoint!

Subtly Smokey


Sasha Alexander


Glamorous and natural all at the same time.  This look is an extra easy one.  It's all about the eyes but also all about not making it too complicated.  Line your eyes with a soft brown pencil eyeliner that is smudge-able (Like Make Up For Ever's Kohl Pencil in Matte Mocha Brown 9k), and then take a shimmery golden brown eyeshadow (Like Urban Decay's Darkhorse) on the tip of a pencil/ bullet brush (like MAC's #219) and press it right over top of your eyeliner.  The Eyeshadow will set the eyeliner in place all while creating a soft smokey effect up from the lash line.  Then take whatever is left over on the tip of that brush and lightly line your lower lash line with it!  

Bronzed Bombshell


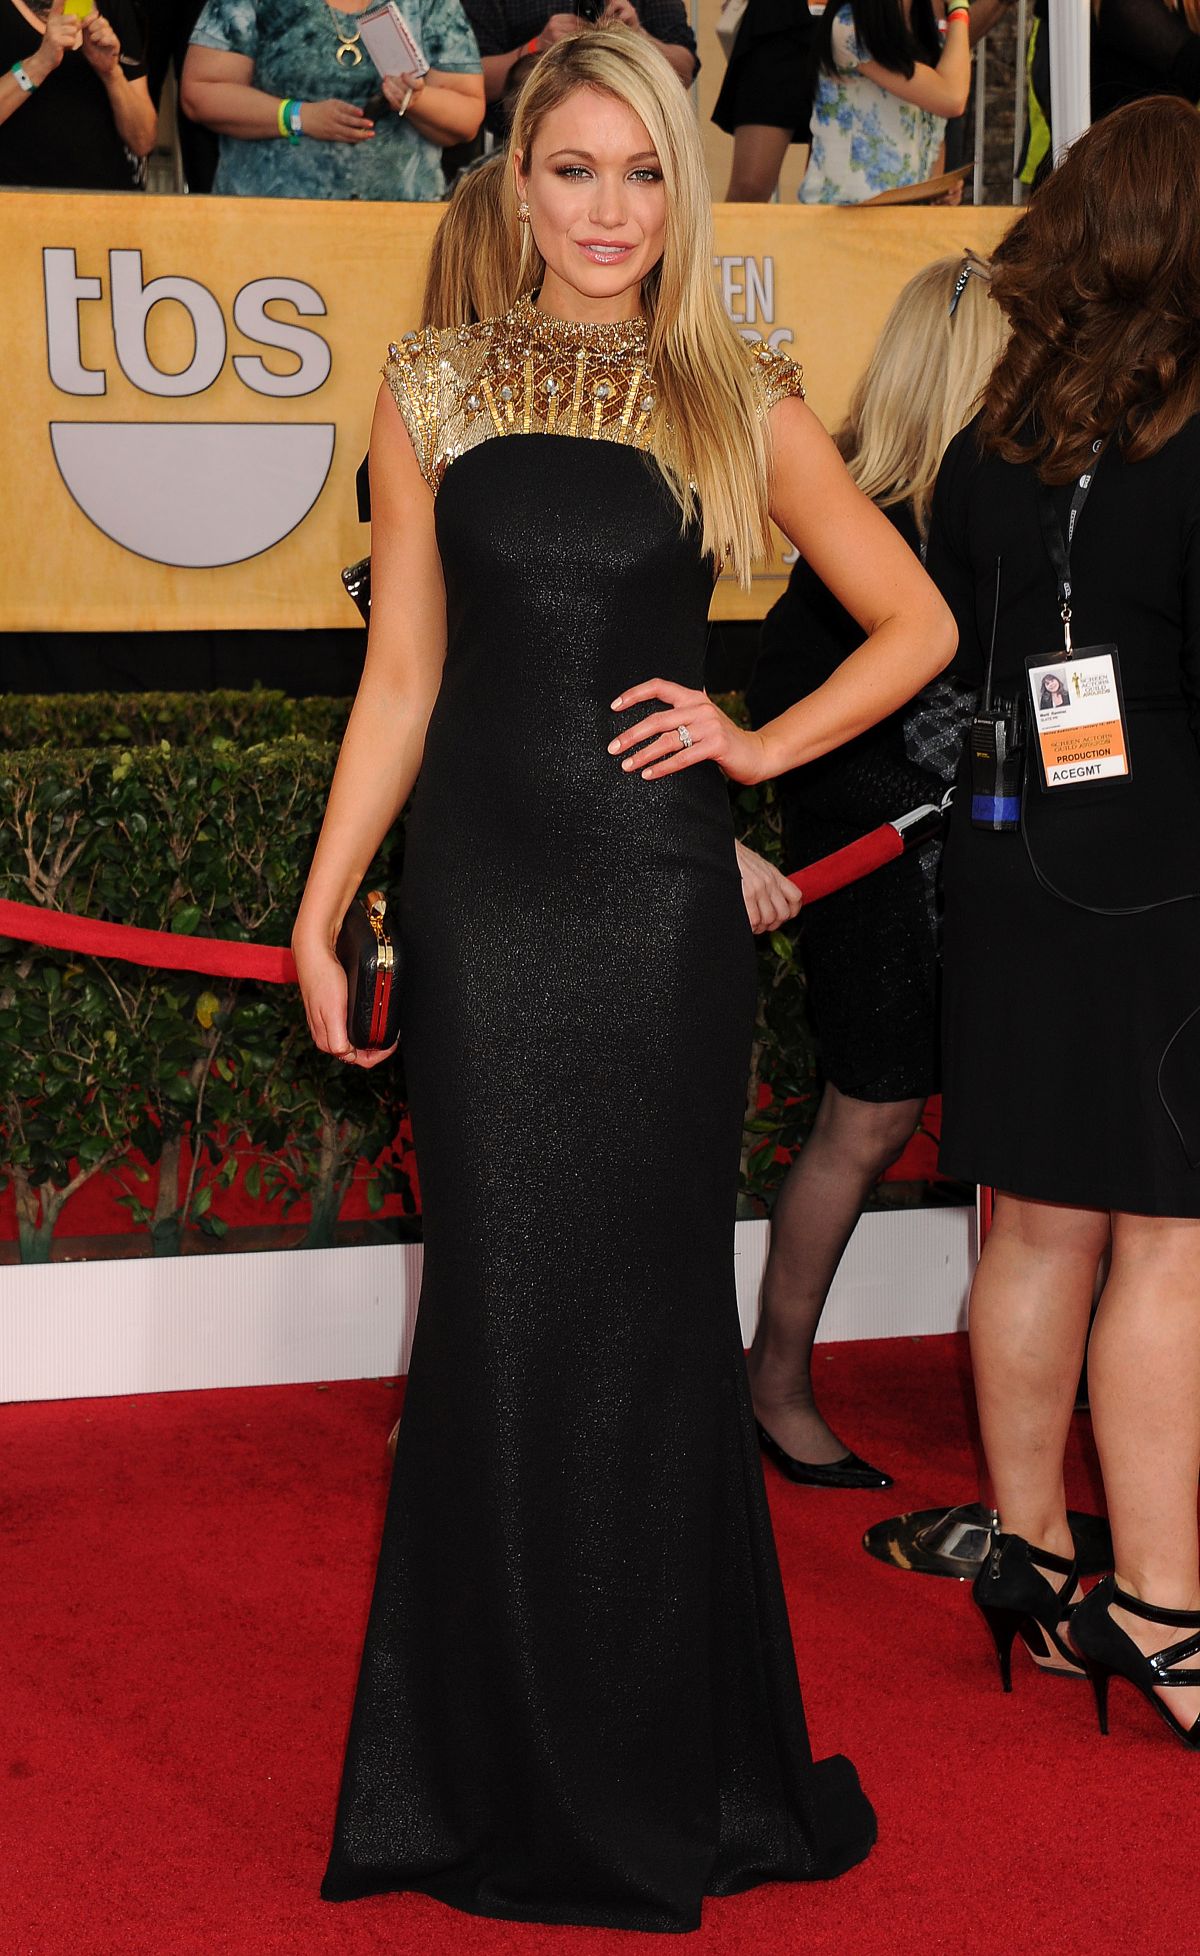
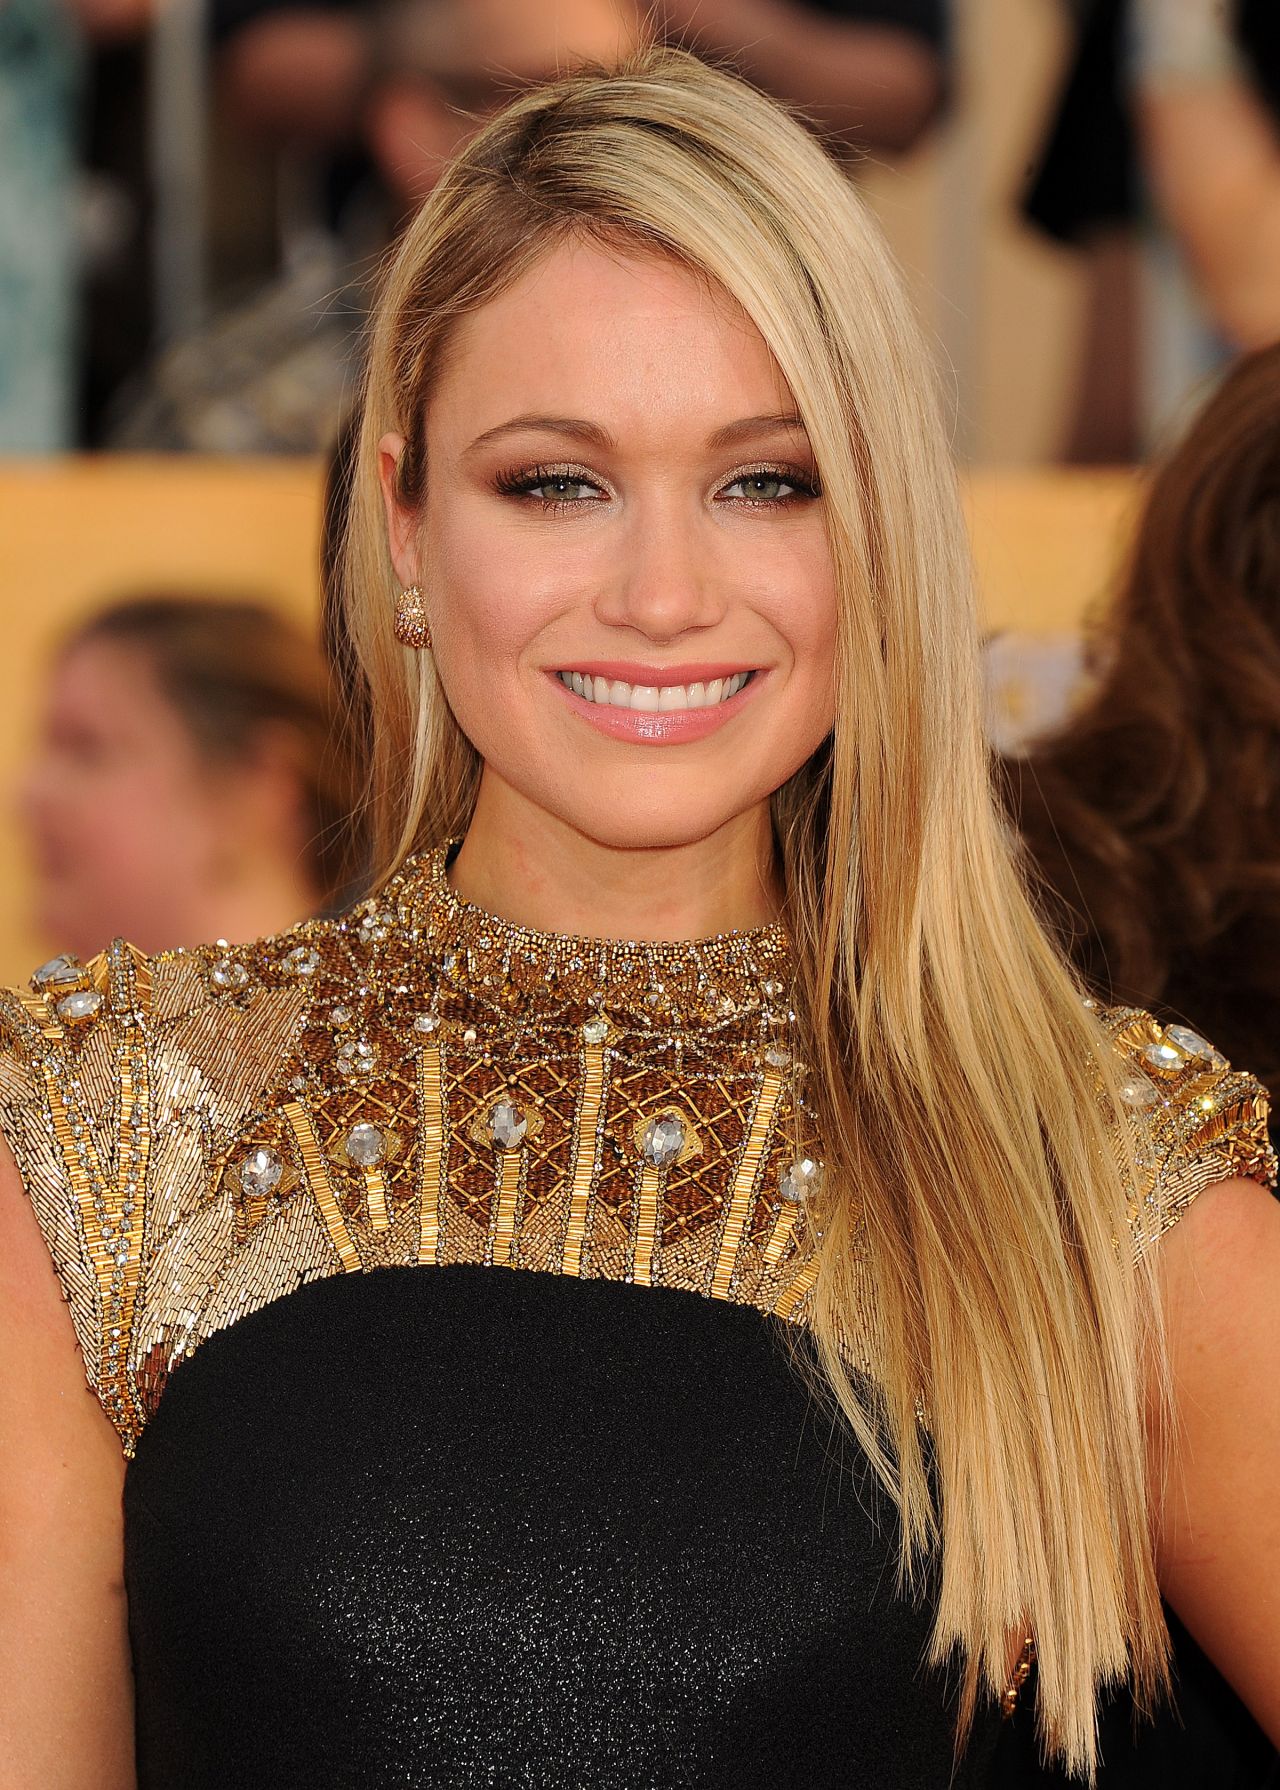
Katrina Bowden


Makeup artist secret- warm browns make everyone look great!  Seriously!  Whenever I change my hair color (I've been all kinds of brunette, all kinds of blonde, and am currently on a redheaded adventure) you'll find me in bronze-y, golden, reddish, orange-y, brown tones for a few days until I've adjusted to my new do!  Exactly the type of makeup on Katrina!  It's just something about wearing these colors.  The only way I can think to explain it is the colors themselves are so warm and sultry then that somehow transfers to your face and making you feel instantly warm and sultry... That made sense in my head...

A few MAC eyeshadows and placement for them that I'd suggest are Woodwinked on the lid, Saddle all through the crease and blended upwards, and then Folie just through the curve of the crease to intensify the look!  Then lash it up with your favorite mascara.  This particular look is better with lots of mascara, so- go for it!

Funky Fresh


Lupita Nyong'o


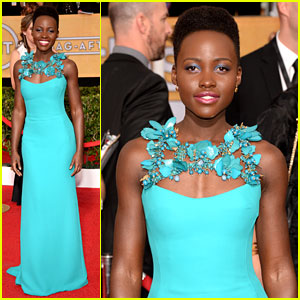
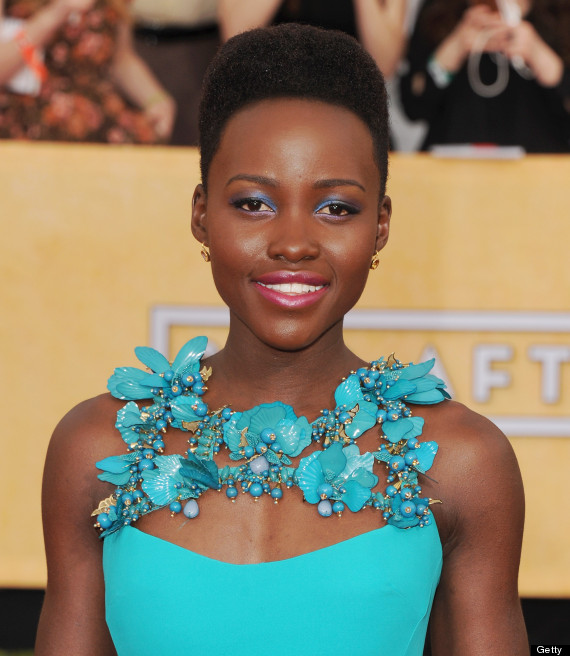
First of all- the blue of this dress is just out-of-this-world fantastic! The cut, the shape, the flowers, the everything is beautiful!  Well done Gucci!  The dress is fun and her makeup artist went fun with the makeup.  Blue can sometimes be a tough color to pull off, especially when you place it like a light wash across the lid.  It can go very 80's very quickly.  She did it perfectly.  This eye creation is a blend of Chanel Quadra Eyeshadow in Fascination and Chanel Ombre Essentielle Soft Touch Eyeshadow in Amethyst.

Red Lip Glamour


Michelle Dockery


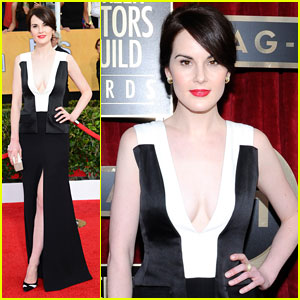
The classic combination of black and white with a pop of red never gets old! To get this classic red lippie there is no other place to turn but MAC, and no other color combination to go for but Russian Red lipstick with Cherry Lipliner.  End. Of. Story.

Super Smoked


Sandra Bullock


Pick a color and stick to it!  I'd go for a charcoal gray/brown (check out charcoal by MAC) from the lash line blended the whole way up.  As easy as this sounds it can go into punched-in-the-eye territory if you're not careful.  The part that gets tricky is the intensity of your brushes.  Go for something flatter and stiffer at the lash line and press the color on and start working your way up, then as you come up on the crease switch to a firm but fluffy brush and start to sweep the color, as you pass the crease do a final switch to a super soft super fluffy brush and continue sweeping.  The fade up has to be seamless so just keep blending!  When you are done and it's blended to your liking I suggest taking a soft shimmery highlight color (like the color Sin by Urban Decay) and pop it right on the tear duct to brighten and open up this eye look.

Head to Toe Stunners (I tried to just pick one but I really couldn't)


Sofia Vergara


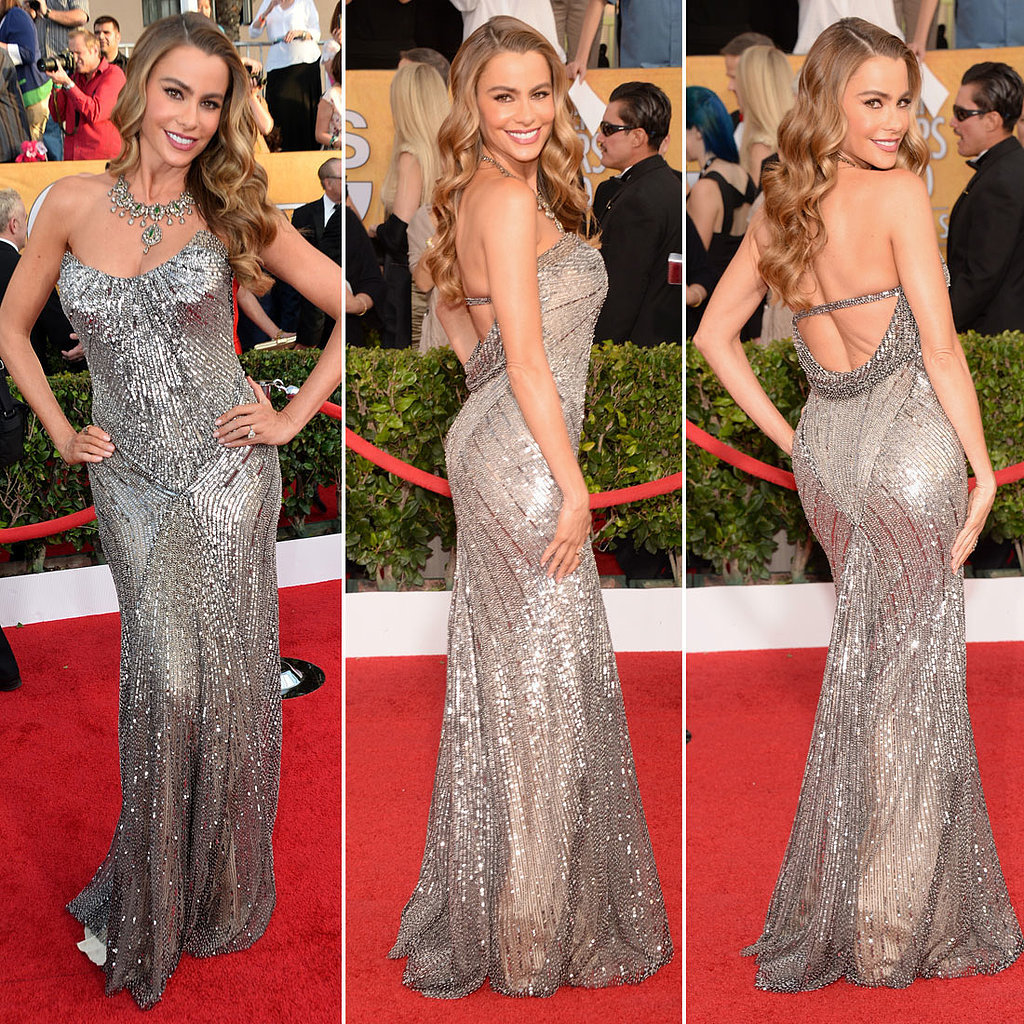
The glitter lover in me just couldn't say no!!!  The waves, the makeup, the dress!  So beautiful!  My absolute favorite thing about her makeup might come as a surprise.  I love that she rocks a full and not too perfect eyebrow!  Here's a little makeup secret- a full brow is youthful.  Combine that with a brighter colored blush, an instant 10 years comes off.  Careful though- I didn't say an un-kept brow!  Tweeze what needs to be tweezed, but avoid going too thin.  If you look closely you'll also notice that her contour and eyeshadow are pointing slightly upward which definitely works to her advantage.  And genetics, that plays a teensy-tiny role!  Haha!  
  
Amy Adams


By far- my absolute favorite dress of the night!  Head to toe she put this together famously!  She looks so classically Old Hollywood but then the orange lip and cut-outs on the dress bring it to a fresh and new level.  By the way- the blue color of the dress and the orange of the lip- remember my Color Theory post?  This is the way to work complimentary colors into your wardrobe!  I'm loving the lip with the classic winged liner and pinup inspired hair.  For the lip try Redd lipliner and Morange lipstick (both by MAC), the liner is that perfect red-orange color and then the lipstick is just the perfect pop of bright orange!  

Did I miss any of your favorites?  Please comment them below if I did!  Thank you for taking the time to read today's post!  I hope you feel inspired to try something new! 


Love,
Michelle

Monday, January 20, 2014

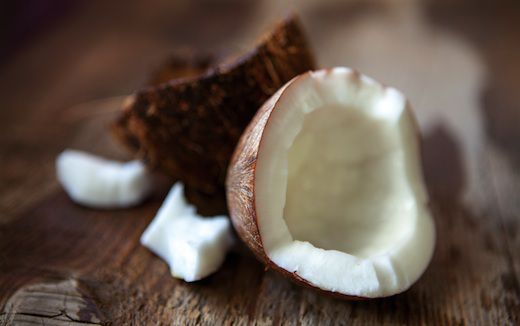
Makeup Tip Monday- Coo Coo for Coco... nuts!?

Calling all beauties with dry skin!  I told you I had a Makeup Tip Monday for you and here it is:  

Coconut Oil!!! 


This stuff is magical!  I have two in my house- one in my kitchen (from Costco) to cook with and one in my bathroom (originally from Whole Foods but now it gets re-filled by the one from Costco) to slather on every last dry patch I have.  You can use it as a facial moisturizer, an eye cream, a hair mask, as shaving oil, as a lip balm, and as a cuticle treatment!  So you can quite literally use it from head to toe.  It has the softest, most natural, and not at all perfume-y, coco-nutty scent.  It's just wonderful.  

The fatty acids naturally in coconut oil help reinforce the skin's natural lipid barrier.  They help lock moisture in the skin, promoting some seriously mega hydration.   You can purchase it at your regular super market; you'll find it next to all your other cooking oils.  It comes in a solid form and the texture is a combination between softened butter and candle wax.  That seems weird but it makes perfect sense once you touch it.  It’s workable like soft butter but it has somewhat of a waxy consistency.  However, once you work it in your hands and warm it up it turns into a regular and familiar oil texture.    


Let’s get into all the different ways you can use it!!!

As a Facial Moisturizer and Eye Cream

If your skin in consistently dry and flaky, you'll love this.  Wash your face, exfoliate, and use a softener (it’s like toner but a lot more hydrating, so it’s better for people with dry skin), then slather this on!  It'll be like the long awaited drink of hydration your skin has been waiting for!  It'll smooth out dry patches and condition your skin, it'll minimize fine lines and wrinkles, and even out any natural redness (or "hot spots") on your skin.  You can do this regimen every night (only exfoliate as needed though).  

If you’re not a big makeup wearer, or just hanging out without it for a day, you can also do this regimen in the morning but if you are wearing makeup I would resort to your regular moisturizer since oils are natural makeup removers (oh yeah, you could use it for that too).  If your skin is truly that dry and it just soaks up the oil you could probably get away with just a tiny bit underneath your makeup, I wouldn't go too over board with it though, unless you want your makeup going for a trip-- off of your face! 

If this feels too greasy for you and you can't deal, I recommend mixing the tiniest bit (about the size of a dry bean) into your regular moisturizer.  That way you still get the benefits without the texture.  But the way to go is to just slather it on if you can.  It will NOT clog your pores or cause breakouts.  The molecular structure of coconut oil is too large to penetrate your pores and cause any of that.     

As a Hair Mask

This is a great once a week treatment.  Just section your hair into four sections (go from ear to ear and then a center part all the way down).  Slather this into each section and comb it through.  Put your hair into a bun or braid and go about your business.  Buns and braids cover a multitude of hair sins (aka bad hair days).  Leave the oil in for as long as possible and for a minimum of 2 hours.  Then just wash your hair like you normally do (I pray you know how to do that already)!

As a Shaving Oil

You can do this before or after your shower- whichever is your preference.  For the most hydration I do recommend doing it after, and if you are doing that I also suggest a light towel dry of the area you are shaving before you start.  Just a warning: It will clog up your razor- so have some hot water nearby to shake it off into. 

As a Lip Balm and Cuticle Treatment

No directions required!  Just put some on all day, every day!  To have some that I could take on the go and stick in my purse I took an empty MAC Paint Pot jar, cleaned it out, and then scooped some coconut oil into it!  Crafty huh!?  

I'm telling you- your skin will feel like a baby's bottom!  Oh wait- YOU COULD USE THIS ON YOUR BABY TOO!!!  Instead of baby oil (for all you natural product mama's out there) after a bath just massage them down with some coconut oil!  

Better yet- just fill your tub with coconut oil and dunk your whole family in!  Haha!  You may seriously consider that once you try this and see what a huge difference it makes!  Enjoy!


Love,
Michelle


P.S. Next weeks Makeup Tip Monday WILL actually be about makeup!  I promise :) 

Friday, January 17, 2014

5 Easy Steps To A Long-Lasting Manicure


It's always a frustrating thing to spend the time and money on a manicure that chips in 2 days and even worse- in just a few hours.  Here are 5 quick tips on how to keep that from happening.  I have been getting manicures regularly for a few years now and if I follow my own tips I won't have any issues.  If I don't, I might as well just go flush $12.  Using these tips I am able to keep my manicure looking fresh for up to two weeks.  


1. Nails are accessories not tools!  Ask someone else or just use a non finger nail tool (I usually use kitchen utensils) to crack open that can of soda or to peel off that sticker!  Treat your nails as the fashionable style statement that they are.

2. Use gloves!  I can't stress this one enough.  From washing dishes to scrubbing the bath tub and everything in between.  Your nails are way less likely to chip when you protect your hands while scrubbing, immersed in water, or when you're using any chemicals.

3. Moisturize your hands and cuticles!  The more moisture you put into your hands the less likely your nails will grow in dry and brittle causing polish to crack and then prematurely chip!

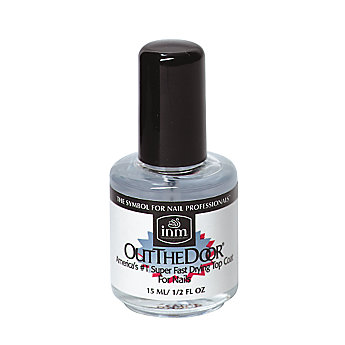
4. Add a layer of top coat every other day!  That'll just reseal everything into place and put an extra layer of added protection.  And don't forget the free edge!  My two personal, all time favorite top coats are

Seche Vite


Out the Door

 Out The Door Fast Drying Top Coat

(you can get both at your local Sally Beauty Supply)

5.  Bring your own nail polish when you get your nails done!  That way if you do get a chip you can easily do a quickie patch fix!  This tip obviously doesn't keep your manicure from chipping, but it will help your manicure look perfect until your next appointment.   

May your nails be forever polished!  Have a great weekend beauties!

Love,
Michelle